|
||
|
||
Body Side Molding Installation
The following are instructions on how to install your BSM's. The Nissan instructions are ok, but I also benefited from Mr. T and Matt Peckham's advice from their post at the Xterrastore.com. Installation should take about half an hour, but if you want to be extra careful it might take an hour.Please post your experience with the BSM install, or any suggestions for improvement on the instructions at the Xterra4x4 message board. Pictures of your final install are appreciated.
What you need:
- Body Side Moldings
- Flexible tape measurer
- 50/50 solution of water and isopropyl alcohol
- Clean, lint-free rag
- Masking Tape
- A clean truck
- Rubber roller (optional)
- Hair Dryer (optional)
Instructions:
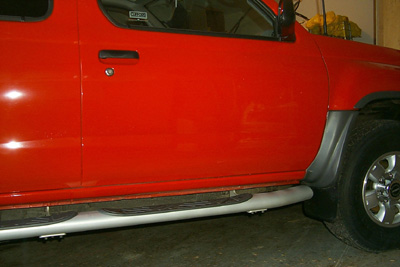
Clean your X:
You don't have to wash your Xterra to put these on, but you'll feel a lot better having a shiny new X with your BSM's installed, so give your truck a bath. After your truck is clean AND dry, wash the area where your BSM's will go with the 50/50 mixture of water and isopropyl alcohol and your clean rag.
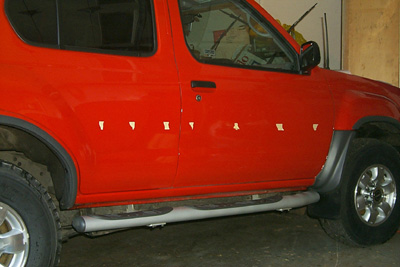
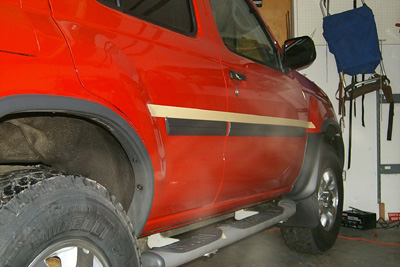
Measure and tape:
First rule on installation: measure, measure, and re-measure. These things don't come off easily, so make sure you measure correctly and check again. The BSM's install at 325.6mm but I followed Mr. T's advice and measured 13.5 inches from the bottom of the door, placing a piece of tape at each mesurement as I went down the body panel. IMPORTANT: If you are using a cloth tape measurer, the body panel changes shape along the length of the vehicle. I noticed that this causes 13.5 on the rear door and 13.5 on the front door to not line up. I'm not sure what the best way to get around this is, but I ended up marking the distances anyway. My advice is go with what "looks" right, and aim for a nice straight line from the front of the truck to the rear.Also note, the 13.5 inch measurement is for the top of the BSM. Therefore you should align the bottom edge of your tape to this measurement.
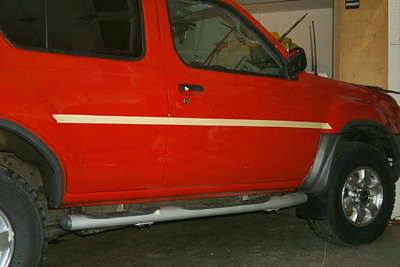
Apply 1 piece of tape horizontally:This is your best visual cue as to whether or not you have a good true line. Because of the problems mentioned before, I went with trying to get a straight line from the front marker to the rear marker, using the intermediate marks to help me along. After laying down the tape, look down the length of the vehicle to see if your line is good. If the tape looks true, then your BSM's will too.
Mark off your vertical measurements:
The instructions state that you want the back end of the front BSM to line up 3mm (+-1mm) from the edge of door opening. Make this measurement and mark it with tape. The rear BSM should line up 4.5mm (+-1mm) from the door opening. Mark this also. The main thing you're looking for here is that the rear BSM clears the front door gap when opening your door. After you have made sure your horizontal tape is lined up, you can cut the tape so that the door opens, and you can make sure your BSM isn't making contact with the front door (this step of checking door/BSM clearance is done after you have temporarily mounted the BSM's using masking tape (see below)).
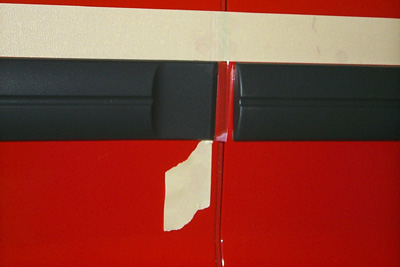
Pre-taping:
Ok, so you have all your measurements correct, and you have the tape marking off their location. Now put some masking tape on the back of your BSM's and temporarily mount them on your door panels. This gives you one last chance to make sure you've done everything correctly before permanent installation. When I did this, I noticed that there was some warping on one of the BSM's, and that I would have to put extra pressure to make it line up with the tape. You can also give another look down the line of your vehicle and make sure the grooves match up between the front and rear BSM. Cosmetically the middle grove on your BSM is supposed to line up with the horizontal line coming from your front fender. If everything looks good, you're ready to start applying them.
Cold Weather:
It's been pretty cold here in Vancouver (At least it was when I wrote this, and lived in Vancouver). The instructions state you should install the BSM's between 60 and 110 degrees Farenheit. I used a hair dryer to heat the body panel. The BSM's were kept indoors and I heated them using the hair dryer before applying.
Application:
This is pretty straight forward, and I ended up following the Nissan instructions. For the front BSM I removed the rear half of the tape. After lining up the BSM to the correct gap measurement, I laid down the BSM following my guide tape. While applying the BSM, lightly adhere the upper panel of the adhesive. If you press lightly in a few spots, you can still do one last check for alignment before locking down the whole BSM. If you messed up, you still have a chance to correct it before pressing down. I didn't have a roller, so I used my hand to apply pressure along the length of the BSM, applying up and down pressure to help seat the adhesive. Pull off the tape from the second half, and continue laying down the BSM to your tape measurement.
The rear piece was applied the same way, starting with the front half where the horizontal measurement was important.
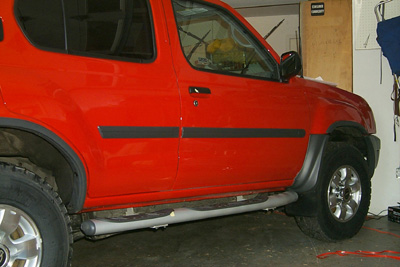
That's it:
A big improvment on the side styling of the X, and you're better protected against side dings from careless door openers.